Posts tagged food
Espresso Caramel Ice Cream

I’m just going to say it. Ice cream significantly improves my quality of life (apart from maybe this one time). That’s right. Not everlasting friendships, not love, not financial security. Just ice cream.

Espresso Caramel Ice Cream | Thyme & Honey

Vanilla, chocolate, coffee, caramel, cheesecake, praline, rocky road, cookie dough, strawberry, banana, fudge, chocolate again, coffee always, breakfast, lunch, dinner, weddings, Bar Mitzvahs, birthday parties, pyjama Sundays – these are just some of many flavours and occasions where ice cream makes my life just great.

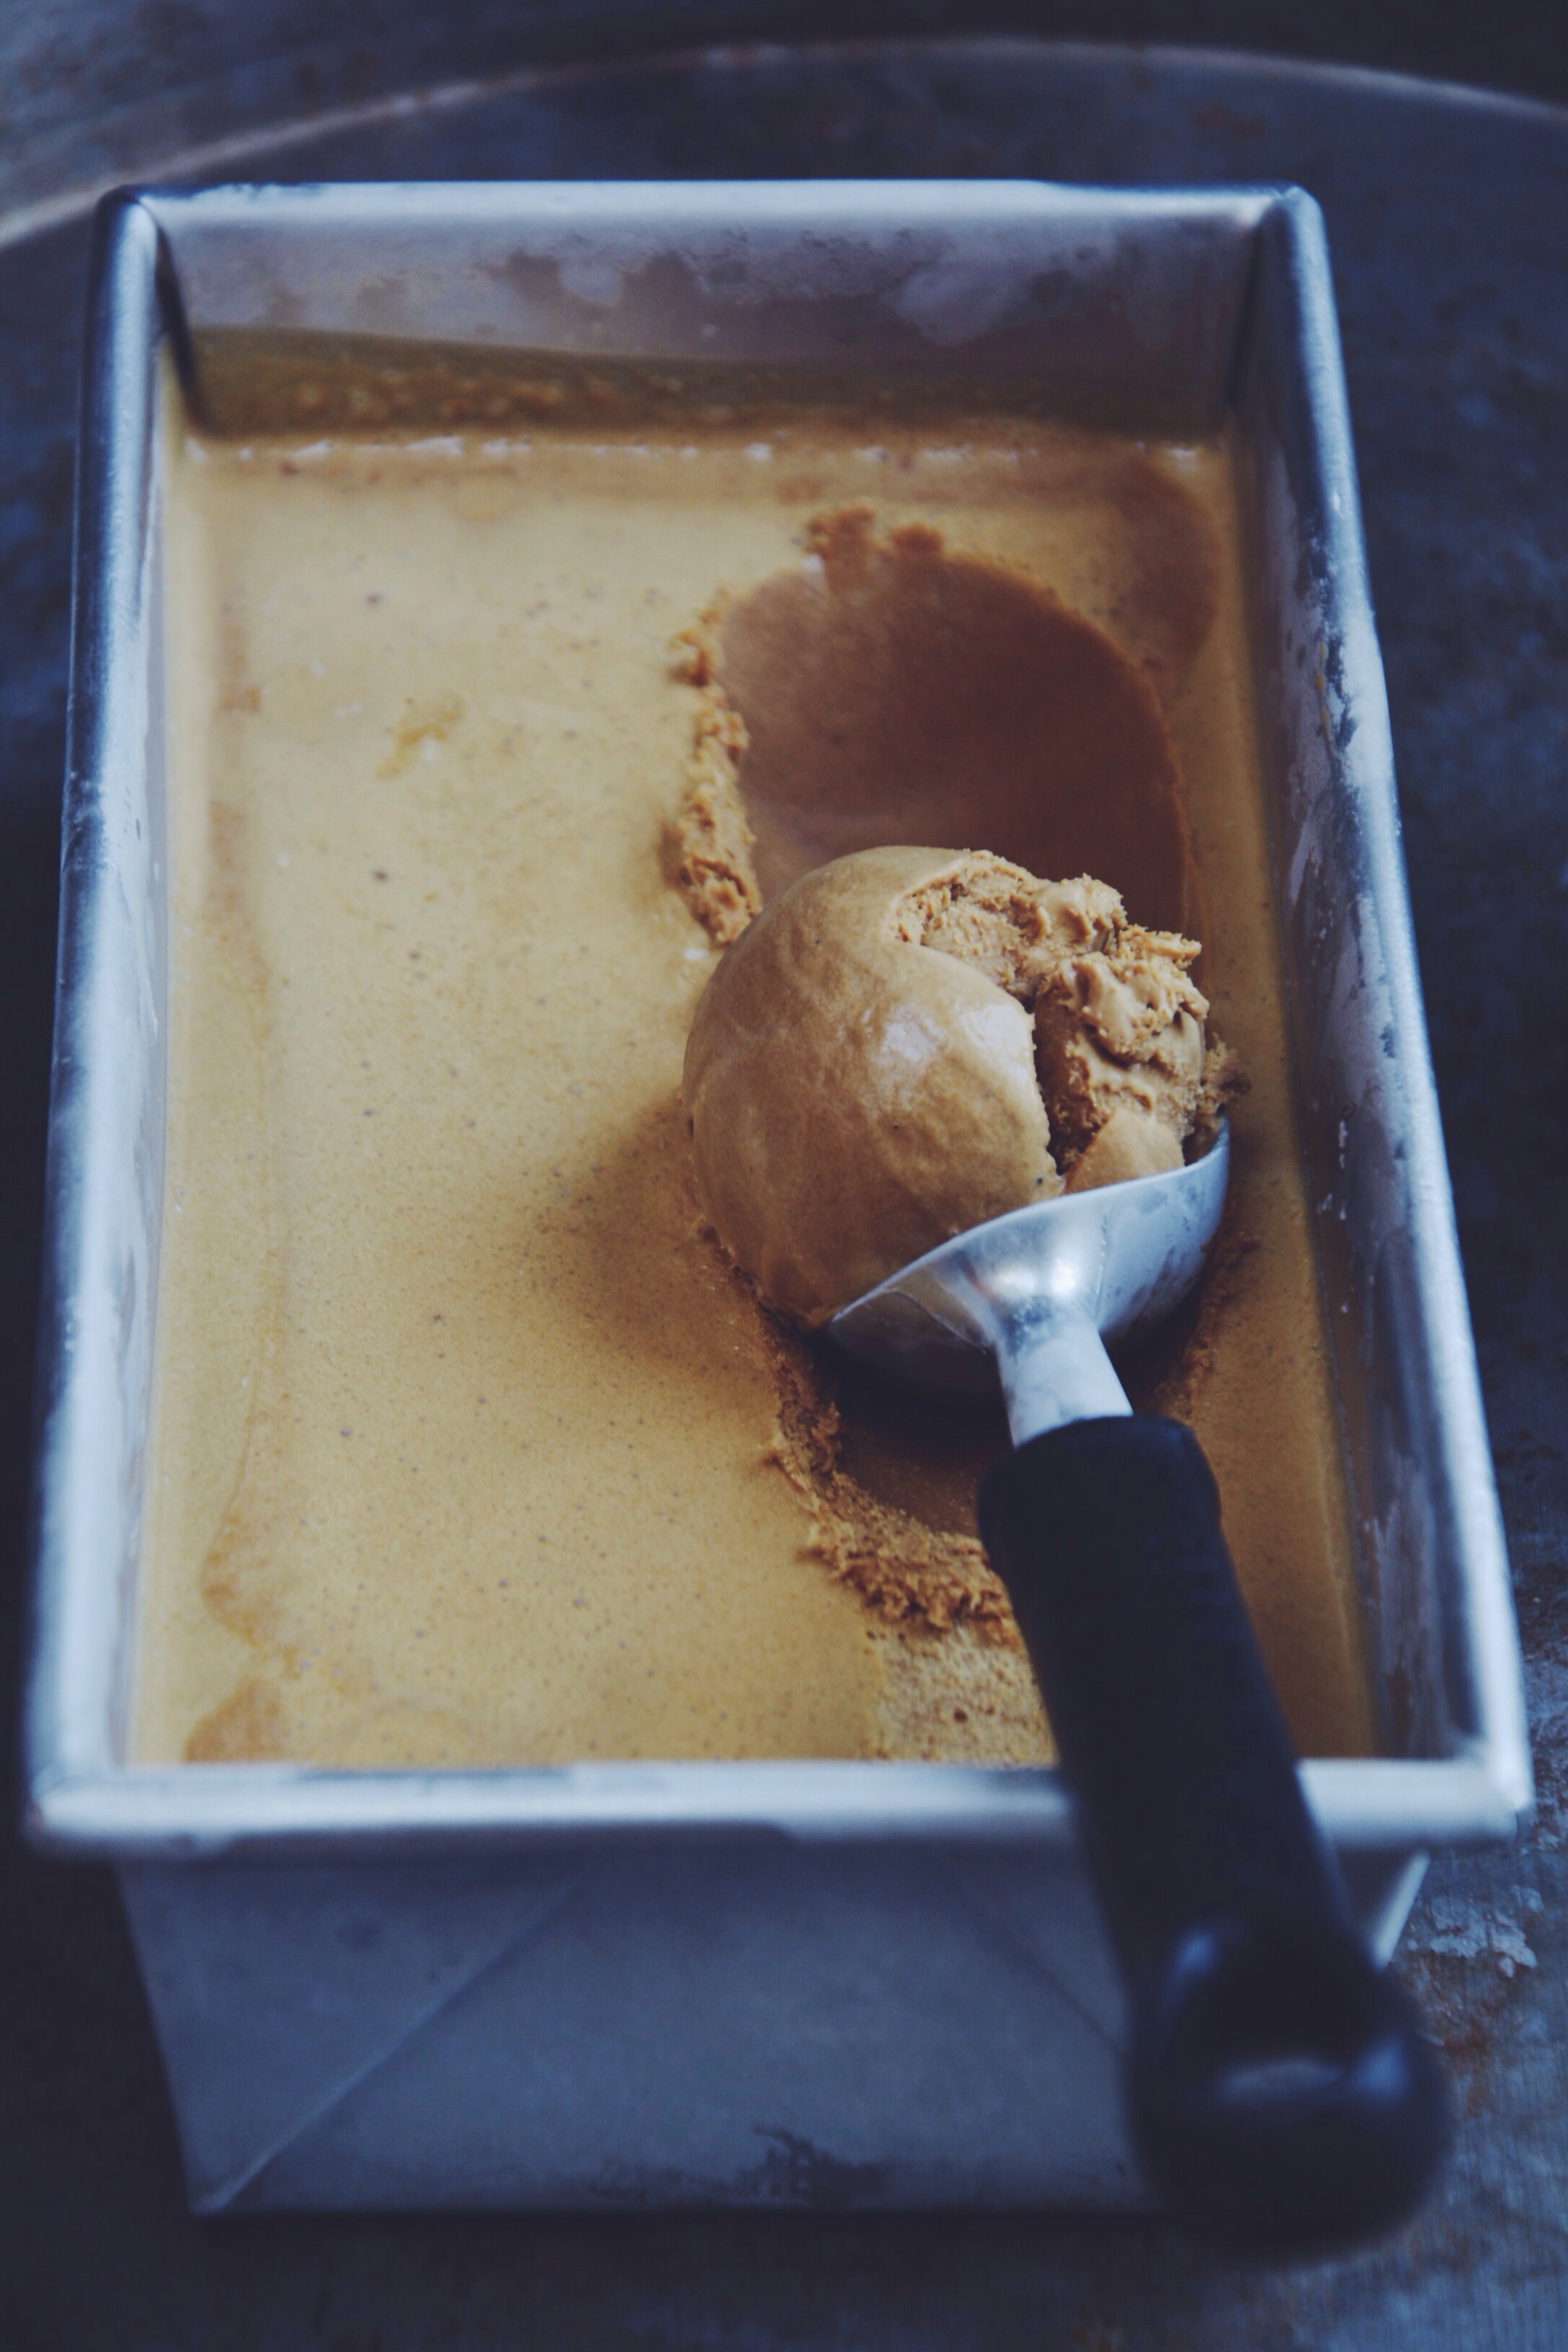
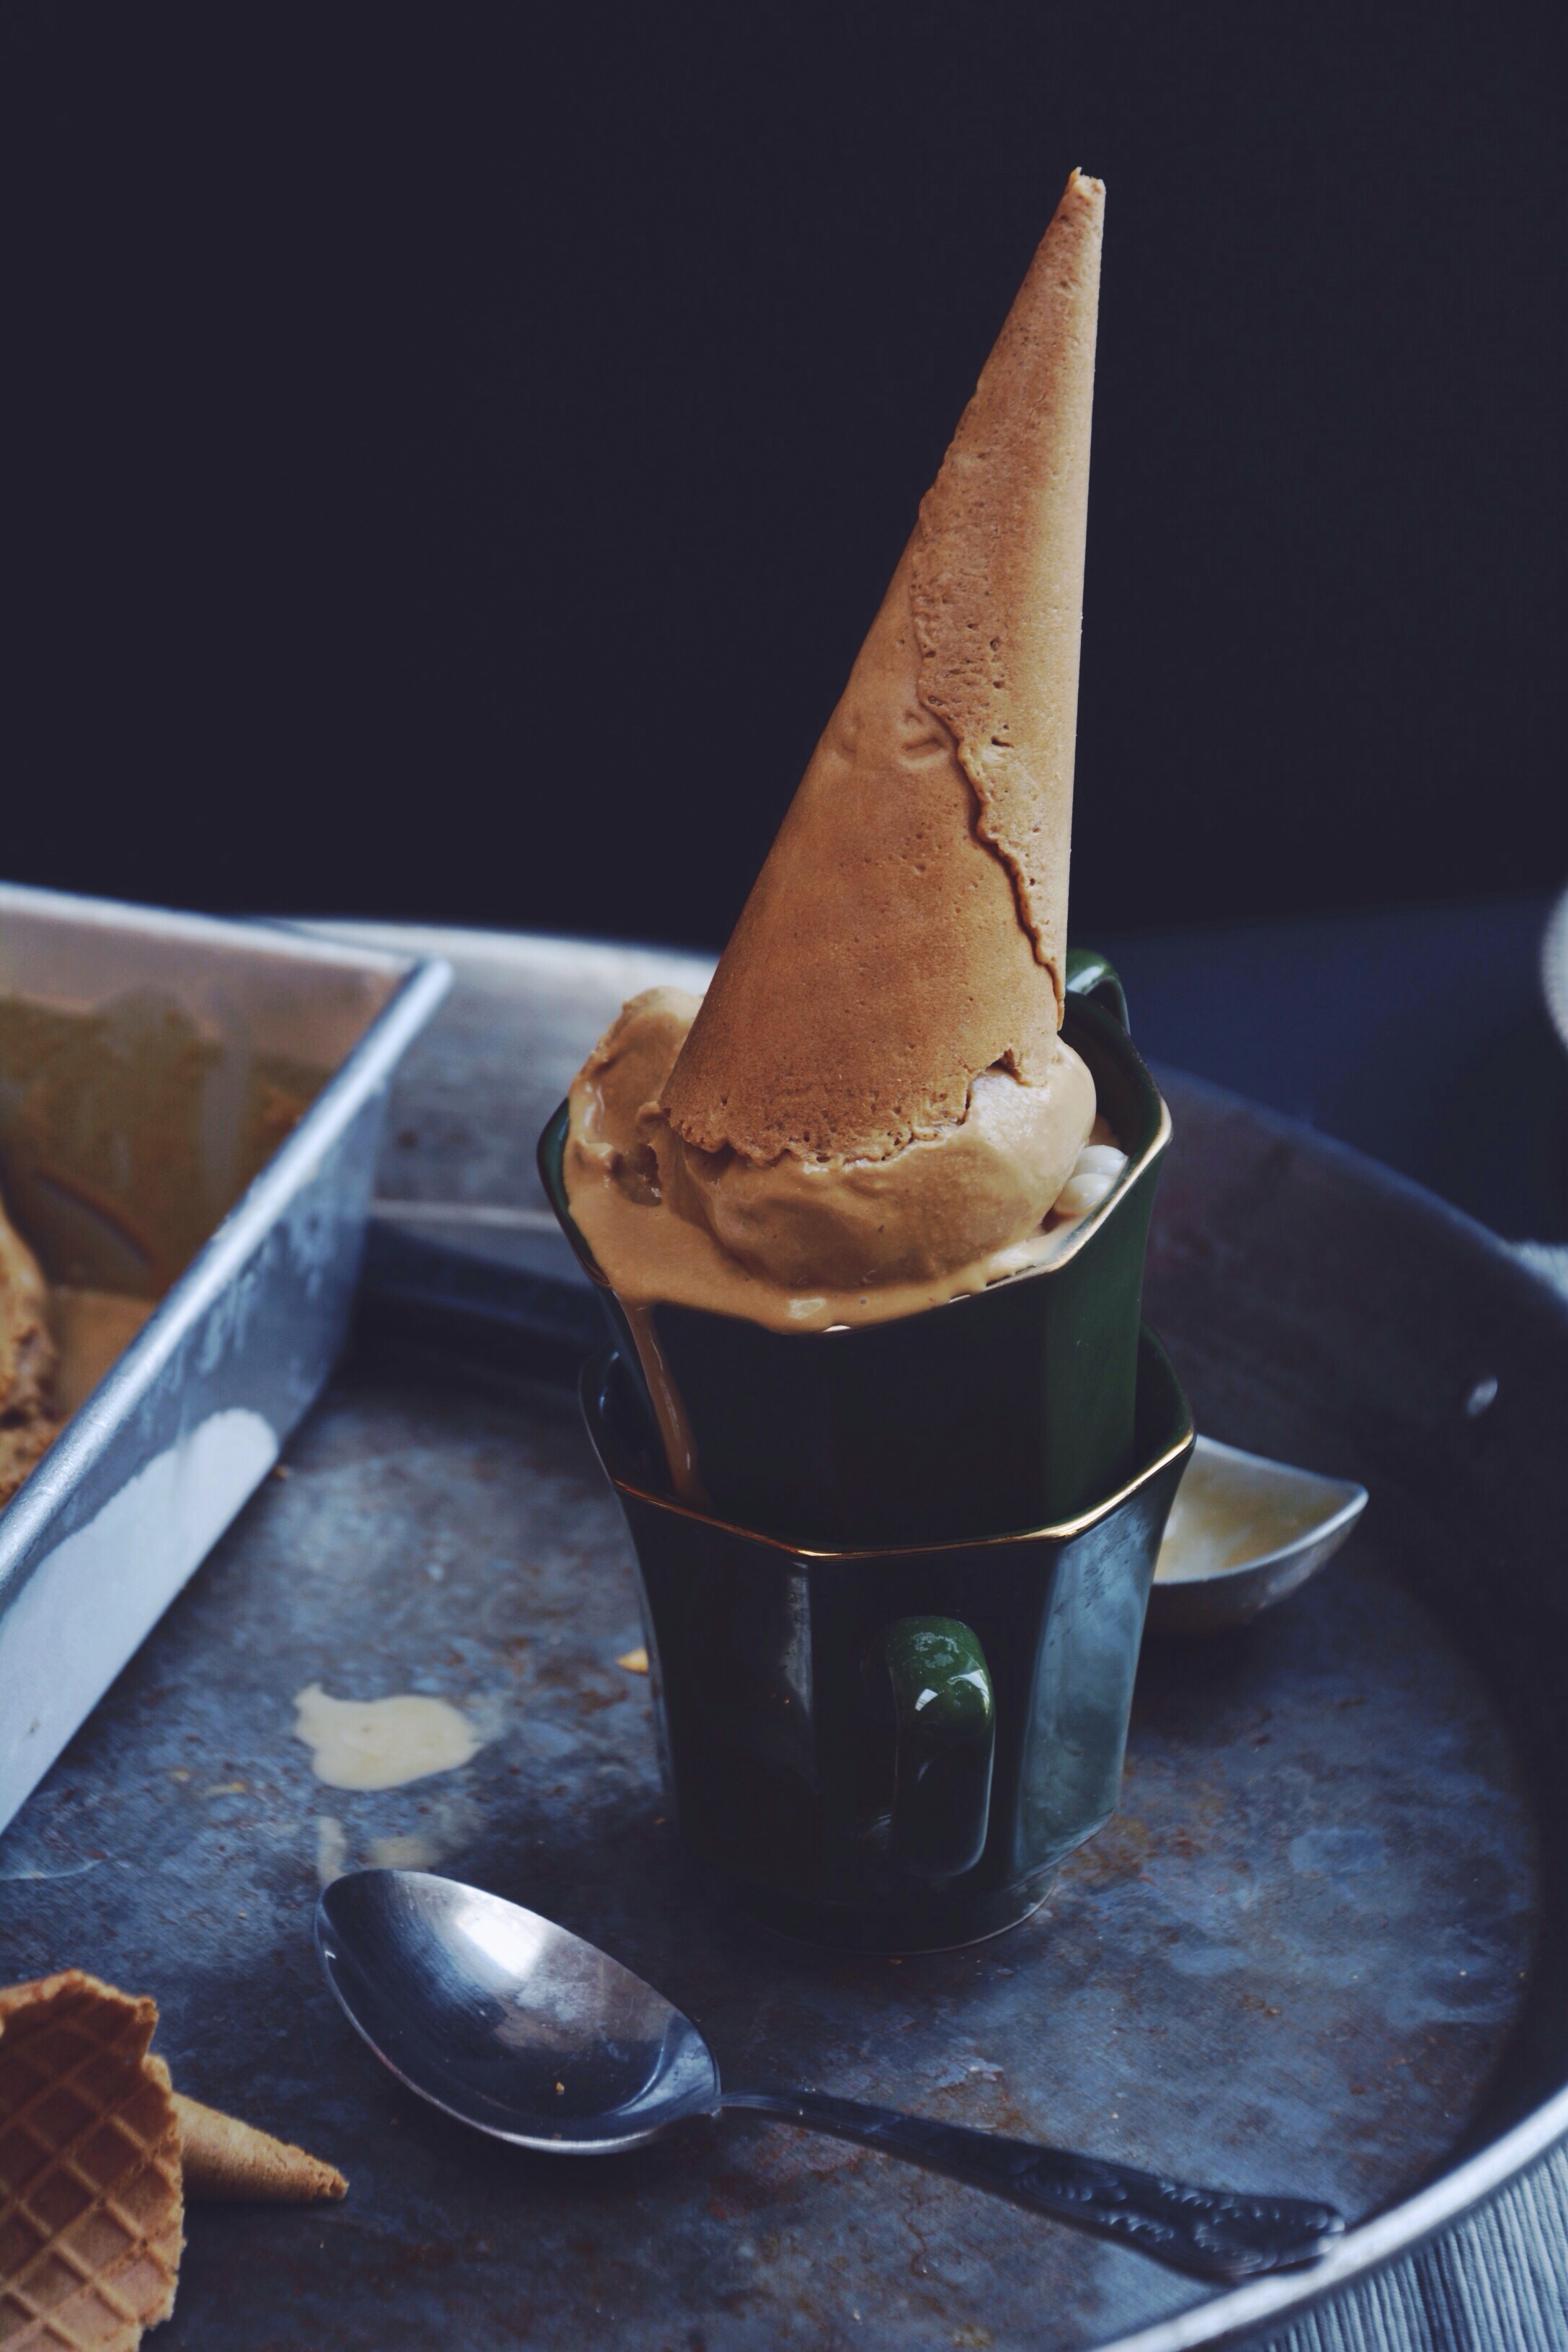
The same goes for this monstrous tub of joy above, so let’s discuss.

Espresso infused cream is mixed with bubbling caramel then spiked with Daim chocolate and churned to creamy perfection. The resulting ice cream is sweet but not overly so, with just the right amount of bitterness from the coffee and crunchy surprises of that Scandi favourite. The coffee in this means it’s entirely acceptable to eat this for breakfast behind closed doors. I don’t think it really gets better than this.

I can just hear some of you screaming ‘but what about donuts?!’ – coming soon my friends… just you wait.

In other news spring decided to show up, which means this song is getting its annual airtime. Enjoy!

Espresso Caramel Ice Cream | Thyme & Honey

Espresso Caramel Ice Cream

Serves 8

Ingredients

480ml double cream

240ml whole milk

1 vanilla bean, split and seeds removed

200g granulated sugar

60ml water

3 egg yolks

2 tablespoons instant espresso powder, mixed to a paste with splash of water (optional for all y’all haterz out there)

100g Daim bar chocolate, roughly chopped


Method

  1. Mix together the cream, milk, seeds from the vanilla bean and espresso paste and set aside.
  2. In a heavy pan, heat the sugar and water until it caramelises and turns dark amber in colour – around 6 minutes. Remove from the heat and whisk in the cream mixture, then quickly return to a low heat to keep warm.
  3. Whisk the egg yolks for 5 minutes until pale yellow. Temper the eggs by pouring in about 1 cup of the caramel sauce, then whisk the egg mixture back into the caramel and heat on low while stirring until it coats the back of a spoon.
  4. Remove from the heat, strain into a large bowl and leave to cool to room temperature.
  5. Once the mixture has cooled stir in the chopped Daim chocolate and simply add it to your ice cream maker and churn according to manufacturer instructions, then transfer the ice cream to a tub and freeze for at least 3 hours or overnight to firm up.

Keeps for one week.

New York Style Bagels

I’m in New York!

Yes. Right now. I am probably eating a hot dog at this very moment. In fact it’s probably my second today. What? I’m on holiday…

I love New York, even though it isn’t mine, the way something has to be, a tree or a street or a house, something, anyway, that belongs to me because I belong to it.
— Truman Capote

My brother moved out to NYC in September and is now living the stereotypical struggling actor’s life waiting tables and adjusting to shoebox living. He’s my best friend, my biggest supporter and one of few who get my weird jokes, so the move was hard and I’ve found that living in different cities is a bit shit, really. We FaceTime, he shows me around his small room in Chelsea, I tell him about the things that have been going on in my life. We discuss House of Cards and Arrested Development, and quote our favourite line from 21 Jump Street frequently. Gah, I’ve missed him. A visit was well and truly due.

So now I’m here,  wandering right through the very heart of it or however the words go, with a carefully compiled hit list of things to devour and places to visit and comfy shoes on my feet. In tow is my best friend, ultimate travel companion and dinner date, we share a love for donuts and other delectables. First on our list: NYC style bagels. I will of course be sure to let you know how they are, but until then they come just as good if not better when made at home. Toasted, smothered with cream cheese and smoked salmon (or blueberries! Definitely a thing) – this will be how I’ll be self-medicating when the inevitable post-NYC blues hit.


New York Style Bagels

Makes 8 medium-sized bagels

Recipe from The Sophisticated Gourmet

Ingredients

500g bread flour

1.5 teaspoons salt

7g active yeast

1 1/4 cups warm water

1.5 tablespoons caster sugar

Optional toppings: sesame seeds, poppy seeds etc


Method

  1. Add the yeast and sugar to warm water and leave to stand for 5 minutes, then stir until dissolved.
  2. Mix together the salt and flour and make a well in the centre. Pour in the water mixture and bring the dough together with a spoon. Start off with half of the water and use as much as needed. The dough will be shaggy. Tip it out onto a well floured surface and knead for a good 10 minutes until springy and pliable. Place in a lightly oiled bowl, cover and leave to rise somewhere warm for 1 hour.
  3. After it’s risen, punch the air out and leave to rest for a further 10 minutes. Preheat the oven to 220°c.
  4. Cut the dough into 8 equal-sized pieces and roll them each into balls. I pull the sides of the dough down and round to the bottom so the balls are taught. With a well-floured finger press a hole through the middle of each ball and widen slightly, then place on a lightly oiled baking tray. Cover with a clean dishcloth and leave to rest while you bring a large pot of water to boil.
  5. Place half of your bagels in the boiling water and cook for 2 minutes on each side. Remove with a slotted spoon and continue with the rest of the batch. Place the now boiled bagels on a baking sheet and bake for 20 minutes and until golden. If you want a slightly crunchier top to your bagels (like me) then bake in the upper third, if not then stick to the lower third of your oven.
  6. If you are adding toppings to your bagels, brush them with egg wash and sprinkle with your toppings after boiling and before baking. 
  7. Leave to cool if you can wait. Best toasted and smothered with cream cheese.
Salted Butter Caramels

So it’s getting to that time of year… the BEST time of year. Fine, I won’t start wearing my Christmas jumpers and cheer until the 1st December, but I will start prepping for Christmas lunch (yes, really) and thinking about gifts. Haters gonna hate.

Salted Butter Caramels | Thyme & Honey

A few years ago I made homemade gifts for some of my friends, partly because I was totally broke yet didn’t want to come across as a total Scrooge. This was back when salted caramel was having a ‘thing’ and everywhere I looked there was salted caramel this and salted caramel that. It seemed like a sign, so off I went and picked up a cheap candy thermometer to get the party started. The resulting caramels were deeelicious, and received as thoughtful and “so cute”. Winning.

Finding myself in a similar predicament to that cold and penniless Christmas, I’m getting my Martha Stewart on once again and am planning an array of homemade treats to gift to friends. I’m thinking jams, nut butters, cookies – the works. And these devilishly buttery salted caramels are definitely making a comeback.

Although these sticky sweet mouthfuls of joy may seem intimidating, it’s more about patience and keeping a watchful eye on the temperature than actual skill. Heat two pans of cardiac arrest, mix them together and heat again – voilà.


SALTED BUTTER CARAMELS

Makes 60 caramels

Ingredients

150g soft light brown sugar

125g golden syrup

100g unsalted butter, cut into cubes

250ml thick double cream

150g caster sugar

1 teaspoon vanilla bean paste

Smoked sea salt flakes


Method

You’ll need: a candy thermometer, parchment paper to wrap the candies in, or if you’re a fancy so and so, candy wrappers.

  1. Firstly prepare a tin for your caramel to set in by greasing with sunflower oil and lining with parchment paper.
  2. In a pan add the brown sugar, golden syrup, butter and cream and place over a low to medium heat. Heat the mixture until smooth and hot, stirring occasionally. Remove the pan from the heat and set aside.
  3. In a heavy duty pan add the caster sugar and 2 tablespoons of water, and start to dissolve over a low heat. Once dissolved you can bring the heat up a little and keep melting the sugar syrup until it caramelises and turns amber in colour. NOTE: You don’t want to stir the syrup unless there are specific spots where the sugar isn’t melting, rather whirl the pan.
  4. Once the sugar syrup has caramelised, remove the pan from the heat and pour in the butter and cream mixture, while exercising caution – this stuff is H O T.
  5. Put the pan back on the heat and pop your candy thermometer in. Bring the mixture up to 250°f and then immediately remove from the heat. Stir in about 1/2 teaspoon of smoked salt and a teaspoon of vanilla bean paste, then pour into your prepared tin and sprinkle the top with extra smoked salt.
  6. Leave (out of the fridge) for at least 5 hours or overnight before cutting into small squares and wrapping individually. These will keep for a good 2 weeks stored in an air-tight container.

First time? The first time I made caramels I followed David Lebovitz’ recipe, which provides detailed advice and guidance for anyone making caramels for the first time. He instructs to heat the caramel until 260°f, basically resulting in a slightly firmer candy. The above recipe makes beautiful, melt in your mouth, soft candies.